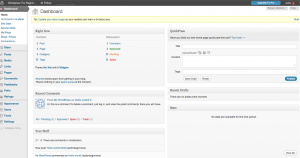
Now that you are logged in to WordPress.com, you are either staring at the dashboard

or the New Post window.
From The Dashboard
To post a new entry on your blog, look at the left-hand menu. Hover over, or click ‘Posts’. This expands the menu. You’ll want “Add New”. Click it.
Posting Your Entry
I know there are a lot of boxes and buttons and general stuff on the page, but all you need to concentrate are the two at the top middle of the screen. You can make friends with any of the other areas of the ‘new post’ page as and when you want to. But really, you might never need them, so don’t worry about them now.
In the top box, right under the “Add New Entry”, type a title for your post.
Underneath, type your entry.
Yes, it’s that simple.
Visual or HTML?
The main blog entry box has two tabs on the top right. One says ‘visual’ and one says ‘HTML’.
Unless you’re a code monkey or want to do something fancy, just let the box stay on ‘visual’. This will give you a nice little row of buttons that let you use bold, italics, bullets etc. If you’re feeling fancy, clikc on the last button in the row (the one that looks like a series of dots) and a second row of buttons will appear. These let you designate a paragraph as ‘paragraph’ text or ‘Header’, and includes the styles built into your theme (more on that in another article). To create the header for this section, for example, I put the cursor in the line “Visual or HTML?” and then used the drop-down box to select ‘Heading 1’).
None of this is essential, though and you can cheerfully ignore it all. Just type and I won’t think any less of you!
Save Draft & Preview
Over in the right sidebar, there is a box named “Publish”. In it you’ll see three buttons: ‘save draft’, ‘preview’ and ‘publish’. There are some other entries in there as well, but you can happily ignore them too, for now (unless you want to keep your entries private, in which case you’re going to have to introduce yourself to the “Visibility Public Edit” link).
I do, however, encourage you to make good use of the ‘save draft’ and ‘preview’ buttons. WordPress.com says it saves your entries as you type, but there’s nothing as reassuring as hitting that ‘save draft’ button after you’ve written a particularly profound paragraph.
The ‘Preview’ button will allow you to see your post as it look on the blog (to a reader). It opens in a new window, so your editing window is still open, underneath. This means you can flip between the two of them, correcting the inevitable typos that don’t show up until you see the post on your blog.
Publish
When you are happy with your draft, hit the ‘Publish’ button. Your post will go live. You’ll be brought back to the post editing window (where you just wrote it). If you want to see the live post, click on the ‘view post’ button just below the blog entry’s subject line.
Category
This is a little more advanced, and certainly not essential, but you might want to make your posts easier to find by organizing them in categories. Believe me, it may not seem like a big deal now, but it is really nice to be able to link to all your articles on ‘recipes’ at once.
If you do want to assign a category you can do it right from the ‘new post’ page, as you’re writing the post. Below the publish button, is a box marked ‘category’. At the bottom of the box is a link: “+ Add New Category”. Click that. Type the new category name and click the ‘add new category button’ (you can ignore the ‘parent category’ option for now).
Some basic category suggestions to get you started (you can always add to these and change them):
- Personal
- Recipes
- Kids Stuff
- Travel
- House
- School
Tags Vs Categories
- Imagine your blog posts as a pile of printed-out pages. If you wanted to organize them, you might put all your posts that contain recipes in a file folder marked recipes. This is what ‘categories’ do for you.
- Within the file folders, however, you might have sticky notes poking out of the edges with things like ‘cakes’ or ‘steak’ or ‘pasta’ so that you can quickly find the right ones. These are your tags.
You don’t have to use tags, and they certainly don’t have to be consistent or boring, but it can be fun to go back in and click on ‘firsts’ and pull up all the entries that had to do with the first time you (or your kids) did something. If you tag your posts (put commas between tags) then pulling up that ‘firsts’ tag, for example, will pull all the entries you’ve tagged that way, no matter what category (file folder) you put them in.
Finishing Up
There are many other options on this screen, but for now, this is all you need to know. Go forth and blog! (and if you have questions or used this advice, please leave a comment below and I’ll come and visit your new blog).
Blogging With WordPress Series
- So you want a WordPress blog?
- Logging Back Into WordPress.com
- Post your next blog entry
- Change the subtitle of your blog from “just another wordpress blog” to something smarter (or nothing)
- Change the appearance of your blog (select a theme)
- Customize your ‘about page’
- Get to know your dashboard better
- Learn how to upload pictures

3 comments
Comments are closed.